Pricebook creation
info
- If you are a user with the Root or Admin role, you can complete the operation.
- Ordinary users need to have the following permissions on their profile to complete this operation.
- Allow user to handle Pricebooks.
Open the app menu in the upper right corner and then click the Pricebooks item, then click the Create new Pricebook button. Specify the details about the pricebook. Read the list below to know more about each field.
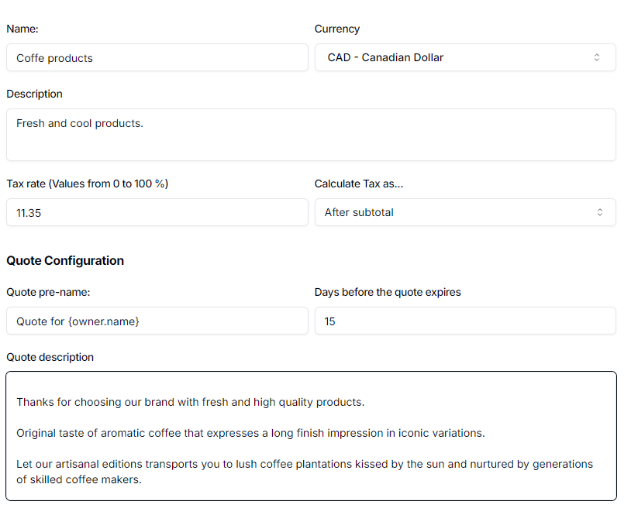
-
Pricebook details.
- Name. The name to identify the pricebook from others.
- Currency. The currency that the prices will have.
- Description. A brief description to help you understand when to use the pricebook.
- Tax rate (Values from 0 to 100%). A numeric value to specify the tax rate for all products in this pricebook, although products can have custom taxes.
- Calculate Tax as. Specify the default method for how taxes should be calculated when using this pricebook.
-
Quote Configuration.
- Quote pre-name. Specify a name that will be generated for quotes automatically when this pricebook is used. You can use the {owner.name} tag to generate the owner name automatically.
- Days before the quote expires. Days of validity for a quote.
- Description. Enter a description to display about your brand, products or services. This will be shown in the quote print view.
The image below shows an example.