Add users
Add users to your organization to work collaboratively, sharing records and updating information in real time within your organization.
Add additional users by completing the following steps.
- Check that you have user seats available in your organization. Otherwise increase this number.
- Get and share the Organization ID and Join Code with the user who will be joining your organization.
- The user who wants to join must search for the organization with the data provided to complete the operation.
Increase the number of seats for users
- You need to have the Root role to edit the user seat limit in your organization.
- If you are a user with the Admin role, you are able to view the users and change their profiles. However, admins cannot perform operations that affect the subscription.
- Ordinary users do not have access to this page.
- You must have a Professional subscription to add user seats into your organization.
The available seats in your organization indicate the number of users who can join your organization. Increase or decrease this number with the buttons found in your subscription details page.

You must first be sure you already have a Professional** subscription.
To increase the number of user seats,
Go to the subscription page, by clicking the user menu in the upper right corner and then click the subscription item.
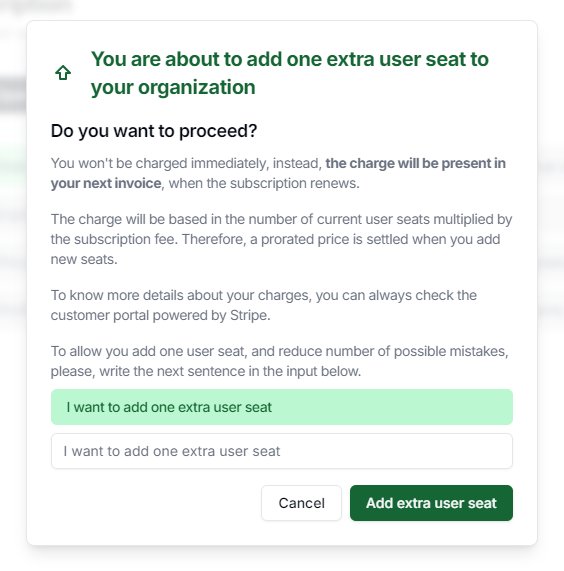
Increase the number of seats for users by clicking the Add one user seat button. A dialog will be presented to mention the changes on your subscription. Read the changes carefully. Type in the text box “I want to add one extra user seat” and click Add extra user button to confirm.
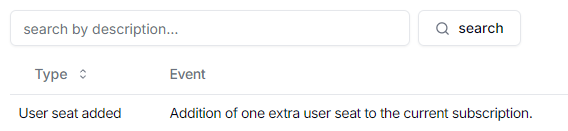
Then you will see that the number of seats has increased by one (+1).
Open the subscription event history to find this movement.
Keep in mind that every time you update the number of seats in your organization, the amount to be charged is also updated in the Stripe service. Where you get billed by the calculation of user seats x monthly subscription price.
Stripe automatically makes a prorated charge for the monthly subscription, this means that you are charged proportionally for the time used for new seats where their periods do not complete a full month to the next billing date.
Get Organization ID y Join Code
- You need to have the Root role to obtain the Organization ID and Join Code of the organization.
- If you are a user with the Admin role, you are able to view the users and change their profiles. However, admins cannot perform deactivation or deletion on other users.
- Ordinary users do not have access to this page.
Once you have updated the number of users’ seats in your organization, you can add new additional users. Understand the following essential concepts to add new users.
-
Organization ID. It refers to a sequence of alphanumeric digits that allow you to identify your organization from others.
-
Join Code. It refers to a sequence of alphanumeric digits that functions as a secret key so other users can join your organization safely. You can generate a new Join Code whenever you want, making the previous one obsolete.
To get your Organization ID and Join Code, go to the Join Code page, by clicking the user menu in the upper right corner and then click the Settings item. On the left side click the Join Code item.
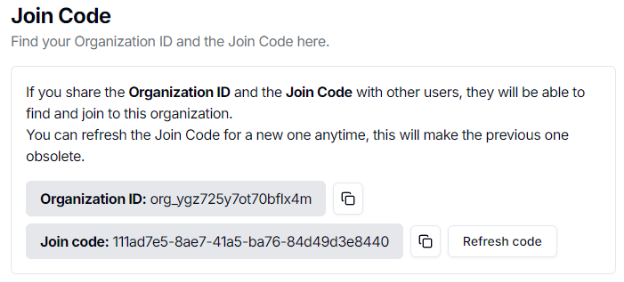
Copy and share the Organization ID and Join Code only with users you want to join your organization.
You can generate a new Join Code by clicking on the Refresh code button, this will generate a new one and make the previous one obsolete, making any attempt to join useless if you do not have the newer.
Search and join a new organization
For the user trying to join a new organization:
- You must have the Organization ID and the Join Code. Ask the Root user of the organization you want to join for both keys.
- Use your Google account to create a new account on Docusseum. You do not have to upgrade to a professional subscription, it is enough to have an account with a free subscription.
- To be able to join another organization, you must not have created records (leads, contacts, accounts, etc. If so, you must delete them), nor information associated with Stripe.
Once the Root user has shared with you the Organization ID and Join Code, go to the Join to Organization page, by clicking the user menu in the upper right corner and then click the Settings item. On the left side click the Join to an Org item. Notice that a form is presented.
If you see a message with the following legend: You can not join an external organization.
Then you will need to verify that there are no records of accounts, leads, contacts, document templates or others.
Verify that there is no associated stripe information too. To see if you have information associated with stripe, go to the subscription page, by clicking the user menu in the upper right corner and then click the subscription item.
If you can see the Open Customer Portal button, then you have stripe information associated with your account. To undo the information associated with your account, you should delete your account and register again.
Once you can view the form, enter the Organization ID, the Join Code and click the Search button. If the values are valid, the organization’s name you want to join will be presented. Click the Join to this organization button.
A dialog will ask to confirm the operation. Read its content and click the Confirm button to complete.If the organization you are trying to join has available user seats, you will join the organization and receive the default profile that exists in that organization.