Create a new invoice
- If you are a user with the Root or Admin role, you can complete the operation.
- Ordinary users need to have the following permissions on their profile to complete this operation.
- Allow user to handle Invoices.
- Allow user to handle Pricebooks.
- Allow user to handle Contacts
Invoices can be only created to contacts. To create a new one, open the app menu in the upper right corner and then click the Contacts item. Search and select the contact for which you want to create the invoice. Open the form menu and click Add new Invoice option.
Search and select the pricebook you want to use.
Assign a due date for the invoice.
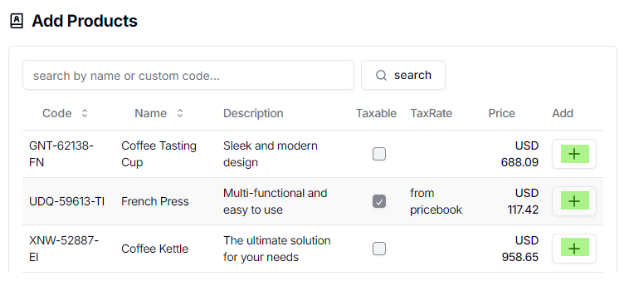
A list of all your products from the selected pricebook will be available. Search and add the products you want to display in the quote. Use the [ + ] sign button to add each of them.
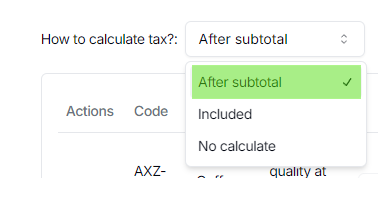
Next select how you want to calculate taxes. This configuration will be firstly set from what is specified in the chosen pricebook.
To know more details about the tax calculation, click here.
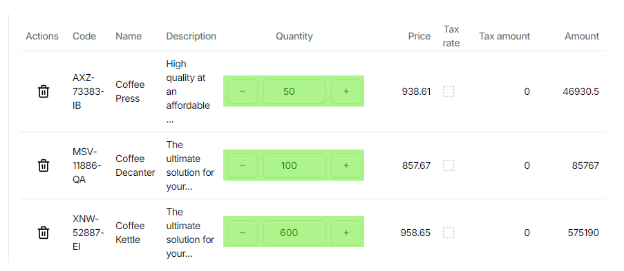
Assign quantities for each element using the less [ - ] and plus [ + ] buttons, or type the quantity in the Quantity column. You can delete any item by clicking the trash can button on each line.
Decide if you apply any discount.
Check the next pages to learn about discounts.
- Add discounts before taxes.
- Add discounts after taxes.
Once you have added products and set your configuration, click the Create Invoice button to create the new invoice. If you have some duplicated products, they will merge in one single row.
If you want to have a print view of the invoice, click the Print view button. Note that there is additional information displayed, such as organization details, information about the user who created it, and existing invoice terms.